Validation and Submission is no more available
EBI BioSample and OLS services made changes on their API and InjectTool is now unable to validate and submit new dato into BioSamples. You can see more information in github issues #119 and #120
Submitting data into BioSamples
The following steps illustrate the procedure to deposit datasets into the BioSamples archive, thus subsequently making it available on the IMAGE data portal
Signing Up and registering to EBI AAP
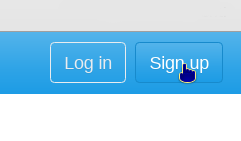
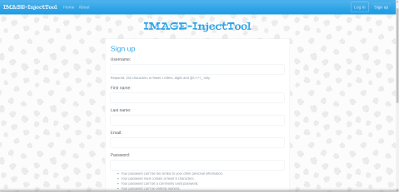
Click on Sign-Up in the top right corner of InjectTool site and start to sign up with InjectTool. In the form, you have to provide a valid email address and select your organization from the provided list. If you don't find your organization, you need to contact InjectTool developers.
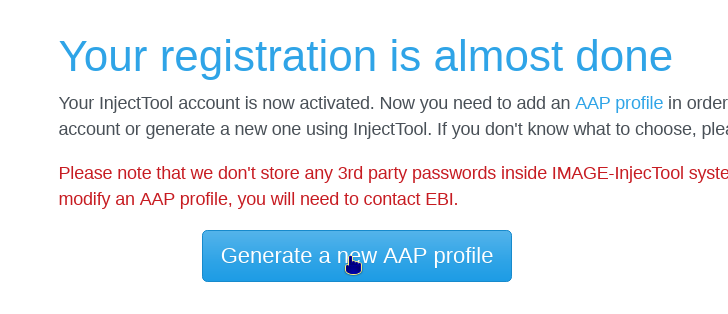
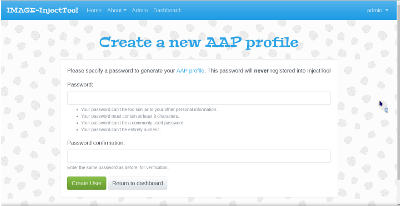
After registration is complete, you will receive an email to the address used for registration. Click on the activation link, in order to complete the InjectTool registration. Now you will require an EBI AAP profile in order to submit your data to EBI BioSamples archive. Please note that we can't store your AAP credentials on our site, you need to keep record of your AAP credentials to make the submissions. Click on Generate a new AAP profile button to fill out the form to create a new EBI AAP profile:
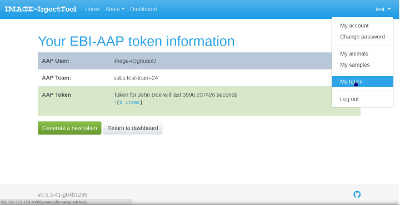
If the registration is successful, you will be able to generate a new AAP token. This token is stored in your browser session, will be valid for 24 hours and will be used to perform BioSamples submissions. When submitting data to BioSamples, InjectTool will check token validity and will ask the user to generate a new token if necessary. You can check your token status by clicking My Token on your username dropdown list in the top right corner of the page
Preparing a new submission
Before starting a new submission with InjectTool, you need to prepare data to upload. Currently, InjectTool support data files from CryoWeb, CRB-Anim and Template data upload.
Creating a CryoWeb dump
CryoWeb data need to be exported as data-only dumps, as described from
Postgres pgdump documentation.
First of all, search for CryoWeb database. You can log into postgres database
and then get database list with \l command, as in the following example:
# psql -U postgres -h localhost
psql (9.1.24)
SSL connection (cipher: DHE-RSA-AES256-GCM-SHA384, bits: 256)
Type "help" for help.

postgres=# \l
                                   List of databases
   Name    |    Owner    | Encoding |   Collate   |    Ctype    |   Access privileges
-----------+-------------+----------+-------------+-------------+-----------------------
 cryo1     | apiis_admin | UTF8     | en_US.UTF-8 | en_US.UTF-8 |
 postgres  | postgres    | UTF8     | en_US.UTF-8 | en_US.UTF-8 |
 template0 | postgres    | UTF8     | en_US.UTF-8 | en_US.UTF-8 | =c/postgres          +
           |             |          |             |             | postgres=CTc/postgres
 template1 | postgres    | UTF8     | en_US.UTF-8 | en_US.UTF-8 | =c/postgres          +
           |             |          |             |             | postgres=CTc/postgres
(4 rows)
cryo1, owned by apiis_admin, is the target database we need to dump.
Other databases are system databases. Log out from the Postgres console with
\q and then make a data-only
dump using the --data-only parameter for the apiis_admin
schema, as in the following example:
# pg_dump -U apiis_admin -h localhost --encoding=UTF8 --column-inserts --data-only --schema apiis_admin cryo1 > cryoweb_data_only_dump.sql
cryoweb_data_only_dump.sql will be a plain text-file in UTF8 encoding we need in order
to create a new submission from CryoWeb data. Those are the first few lines of the
data-only dump:
--
-- PostgreSQL database dump
--

SET statement_timeout = 0;
SET client_encoding = 'UTF8';
SET standard_conforming_strings = on;
SET check_function_bodies = false;
SET client_min_messages = warning;

SET search_path = apiis_admin, pg_catalog;

--
-- Data for Name: animal; Type: TABLE DATA; Schema: apiis_admin; Owner: apiis_admin
--

INSERT INTO animal (db_animal, db_sire, db_dam, db_sex, db_breed, db_species, birth_dt, birth_year, latitude, longitude, image_id, db_org, la_rep, la_rep_dt, last_change_dt, last_change_user, dirty, chk_lvl, guid, owner, version, synch, db_hybrid, comment, file_id) VALUES (851, 816, 2, 118, 2022, 366, NULL, '1999', NULL, NULL, NULL, 144, NULL, NULL, '2010-03-26 12:12:02', 'vsa', NULL, NULL, 12389, 'Italy', 2, NULL, NULL, NULL, NULL);
INSERT INTO animal (db_animal, db_sire, db_dam, db_sex, db_breed, db_species, birth_dt, birth_year, latitude, longitude, image_id, db_org, la_rep, la_rep_dt, last_change_dt, last_change_user, dirty, chk_lvl, guid, owner, version, synch, db_hybrid, comment, file_id) VALUES (852, 1, 2, 118, 2022, 366, NULL, NULL, NULL, NULL, NULL, 144, NULL, NULL, '2010-03-26 12:12:00', 'vsa', NULL, NULL, 12391, 'Italy', 3, NULL, NULL, NULL, NULL);
Creating a CRB-Anim dump
Data from CRB-Anim can be imported using a standard CSV file. However, in
order to import data correctly, CSV file has to start with a header row
in which those column are defined (the order of them doesn't matter):
        'sex',
        'species_latin_name',
        'country_of_origin',
        'breed_name',
        'animal_ID',
        'sample_bibliographic_references',
        'sample_identifier',
        'animal_birth_date',
        'sample_storage_temperature',
        'sample_type_name',
        'body_part_name',
        'sampling_date',
        'sampling_protocol_url',
        'sample_availability',
        'EBI_Biosample_identifier'
Creating a template file
The Template file is created based on the IMAGE metadata.
Some information will be provided by InjectTool, for instance the submitter and the institute are provided by
the user during the registration process and will be used every time a submission is made under that account.
To upload your data, download an empty template file from
here
and start by filling breed, animal and sample
sheets: not all columns are mandatory, please refer to
IMAGE metadata - sample specification
for a list of mandatory and recommended attributes. Not all columns are
required to have a successful upload, please take a look to breed_description,
animal_description and sample_description sheets to
have an idea on what fields are currently supported by the Template
loading process and which values are permitted by InjectTool.
Please keep in mind that animal IDs in animal
and samples sheets need to be consistent in order to have a
successful upload; the same applies to the value used for Species and Breed in animal sheet
that need to be consistent with the values used in the breed sheet.
Starting a new submission
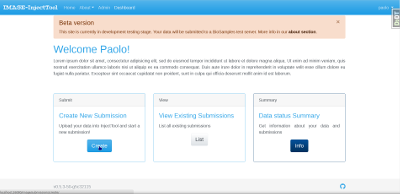
From the Dashboard page, click
on the Create submission button,
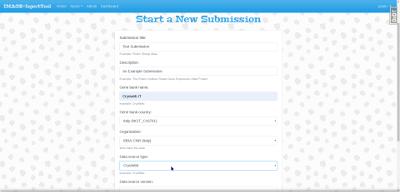
and then fill the form properly: every field will form part of the metadata of all records within this submission.
The Gene bank country field is important since it
will be used to translate terms from the provided language into the standard
English if needed. Another important field is the
Data source type from which the importer will be determined.
Currently InjectTool supports three data sources types:
CryoWeb, CRB-Anim
and Template. Then you have to choose the
file to upload using the Uploaded file field. File should be
in plain text and UTF-8 or ASCII encoding
for the CryoWeb and CRBanim data import,
and in .xlsx for the template file. Providing a different file format
will result in a failure in uploading process.
After the submission is created, data will be imported in background by the system. When submission shows the Loaded status, data are imported with success from your data source file and need to be validated before submission. You can have more information on submission statuses here.
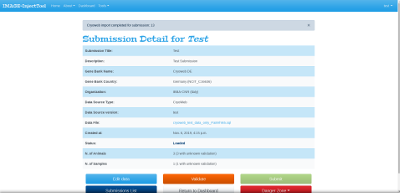
Annotation tasks are called automatically after data import. Annotation is done by searching for good matches in proper ontologies using Ontology Lookup Service. Sometimes is not possible to find automatically the best match, or some new ontology terms could be added after data has been already processed by InjectTool. In such cases, you can start annotation tasks manually by clicking on Annotate button in the Ontology report page.
Validate your submission
You will need to validate your data against IMAGE metadata before submitting data into BioSamples. From the submission detail page click on the Validate button at the bottom of the page:

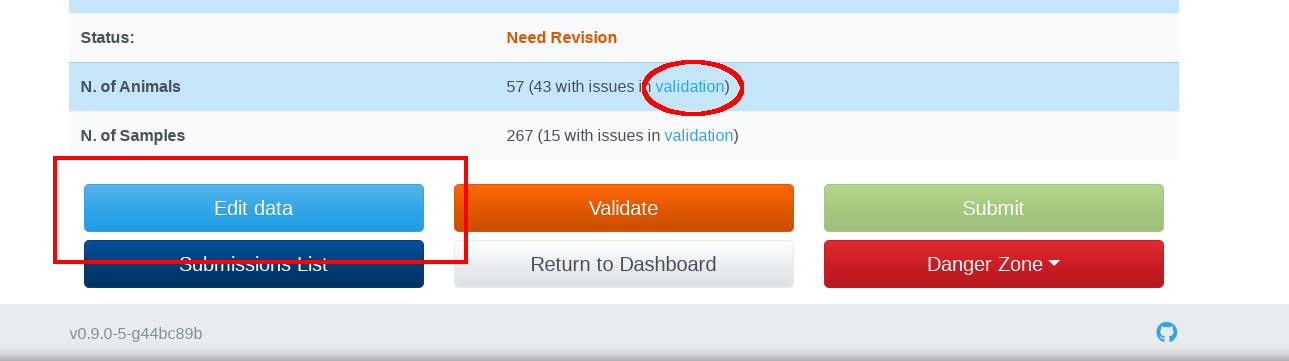
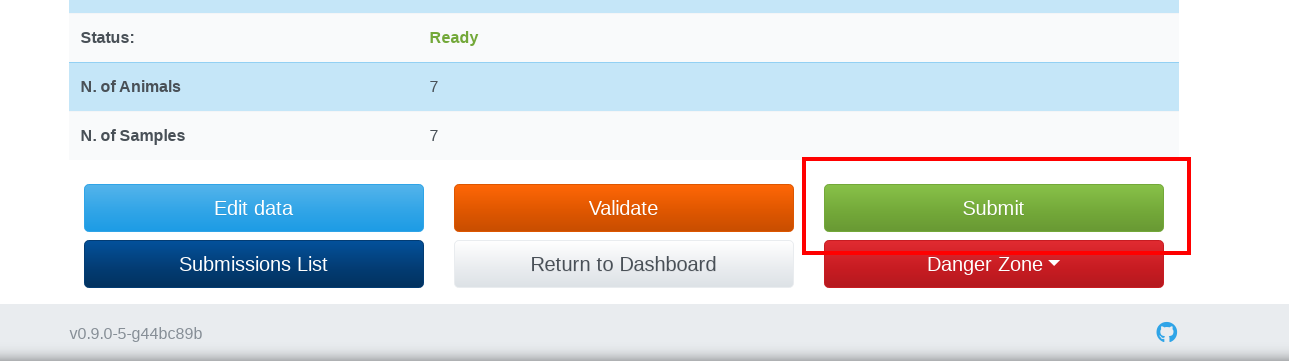
Your submission will turn into the Waiting status during the validation process. During this state you are not allowed to modify your submission, nor delete or submit it. When the validation process completes, your submission could be in one of the two statuses: the Ready status means that your data are compliant with the IMAGE metadata and can be submitted to BioSamples as IMAGE sample data; The Need Revision status indicates that your data have issues to meet the standards. To curate your data, you could click on validation link in the Sample or Animal issues field in order to Bulk update records with the same type of errors. Or you could click on the Edit data button to manage and fix individual records:
Submit your data to BioSamples
If your data are valid and in the Ready status, you can submit them to BioSamples by clicking on the Submit button at the bottom of the submission detail page. You could be prompted for a password in order to generate a BioSample token. This password is for the AAP profile, not the password for InjectTool:
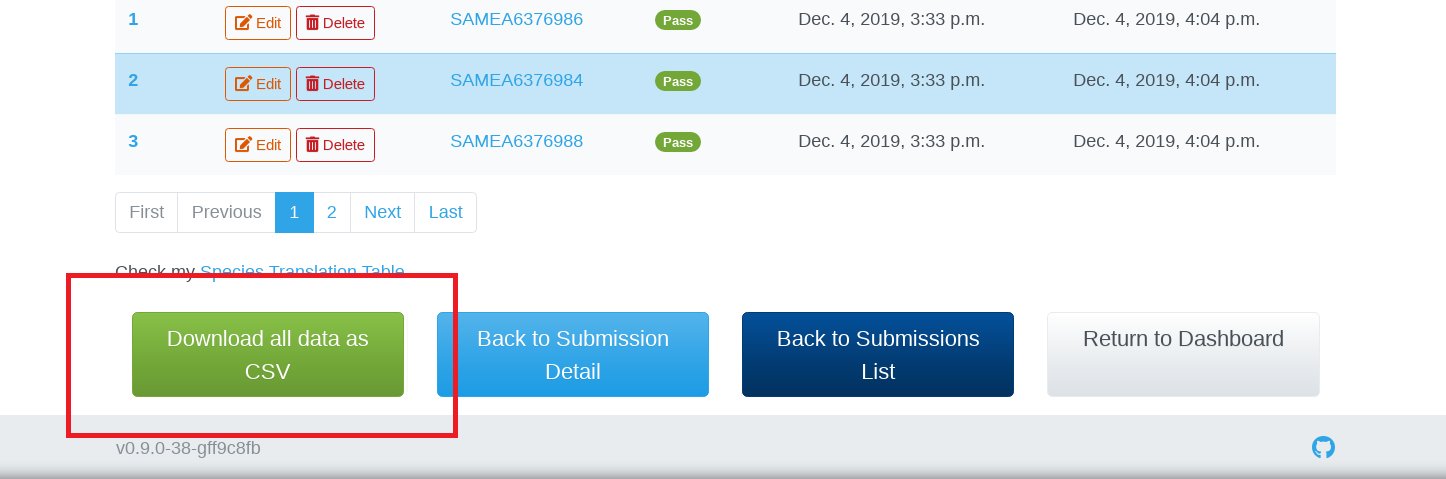
While your data are being submitted to Biosamples, your submission will sequentially enter into Waiting (submission in progress) and Submitted (submission completed) status: during which you won't be able to modify or delete your data. InjectTool will monitor regularly on your submission process, connecting BioSamples server for feedback. When the BioSamples server sends back a list of BioSamples accessions, your submission will change its status to Completed: this means that your data are successfully submitted to BioSamples and have received BioSample accessions. You can inspect your submitted data by clicking on Edit data button followed by clicking on the BioSamples id link:
Export submitted BioSamples IDs
From the same Edit page you could export a CSV containing all your BioSamples IDs by clicking on Download all data as CSV button, as shown in figure:
InjectTool demonstration video
The following video shows the main steps starting from user registration to BioSamples submission:
InjectTool video demonstration